最近又是很长一段时间没写文章了,忙着学习webpack,react,react-router,eslint,babel,mobx,一系列框架,开源的SimpleOne项目也在持续维护,把以前的ES5语法改为ES6,移除了react-timer-mixin这个模块,当然这个项目中的某些技术点需要总结,接下来的几篇会对这些技术点做一个记录。我们的app经常会用到长列表的展示方式,显示内容过多,大多数情况会用到分页加载,滑动到列表的底部,通过加载更多的方式,显示下一页的内容,看起来是一页,其实是多页拼接的长列表。一般我们的列表都有下拉刷新,但是这些react-native没有封装好的组件,我们需要自己实现,下面详细记录实现过程,如果你有更好的实现方式,希望一起学习讨论。
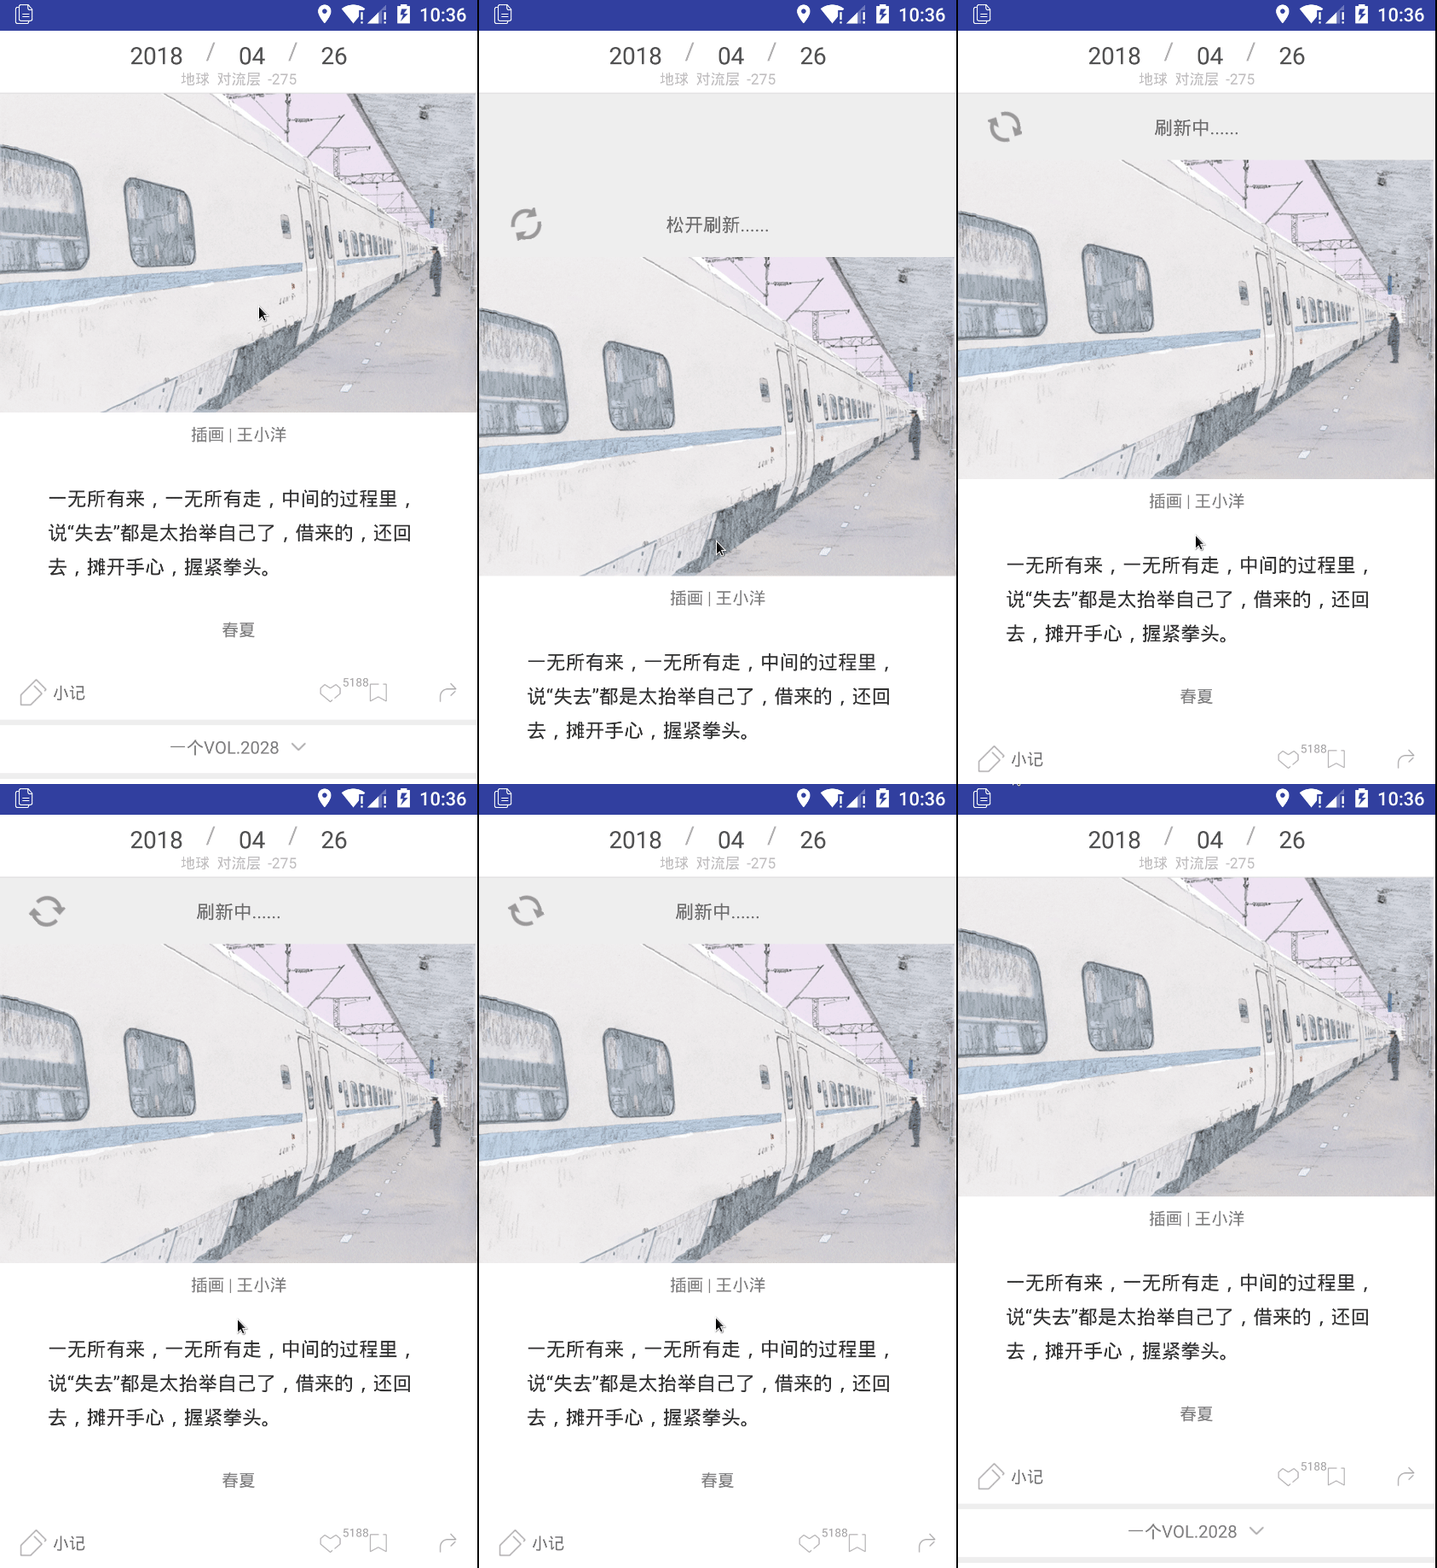
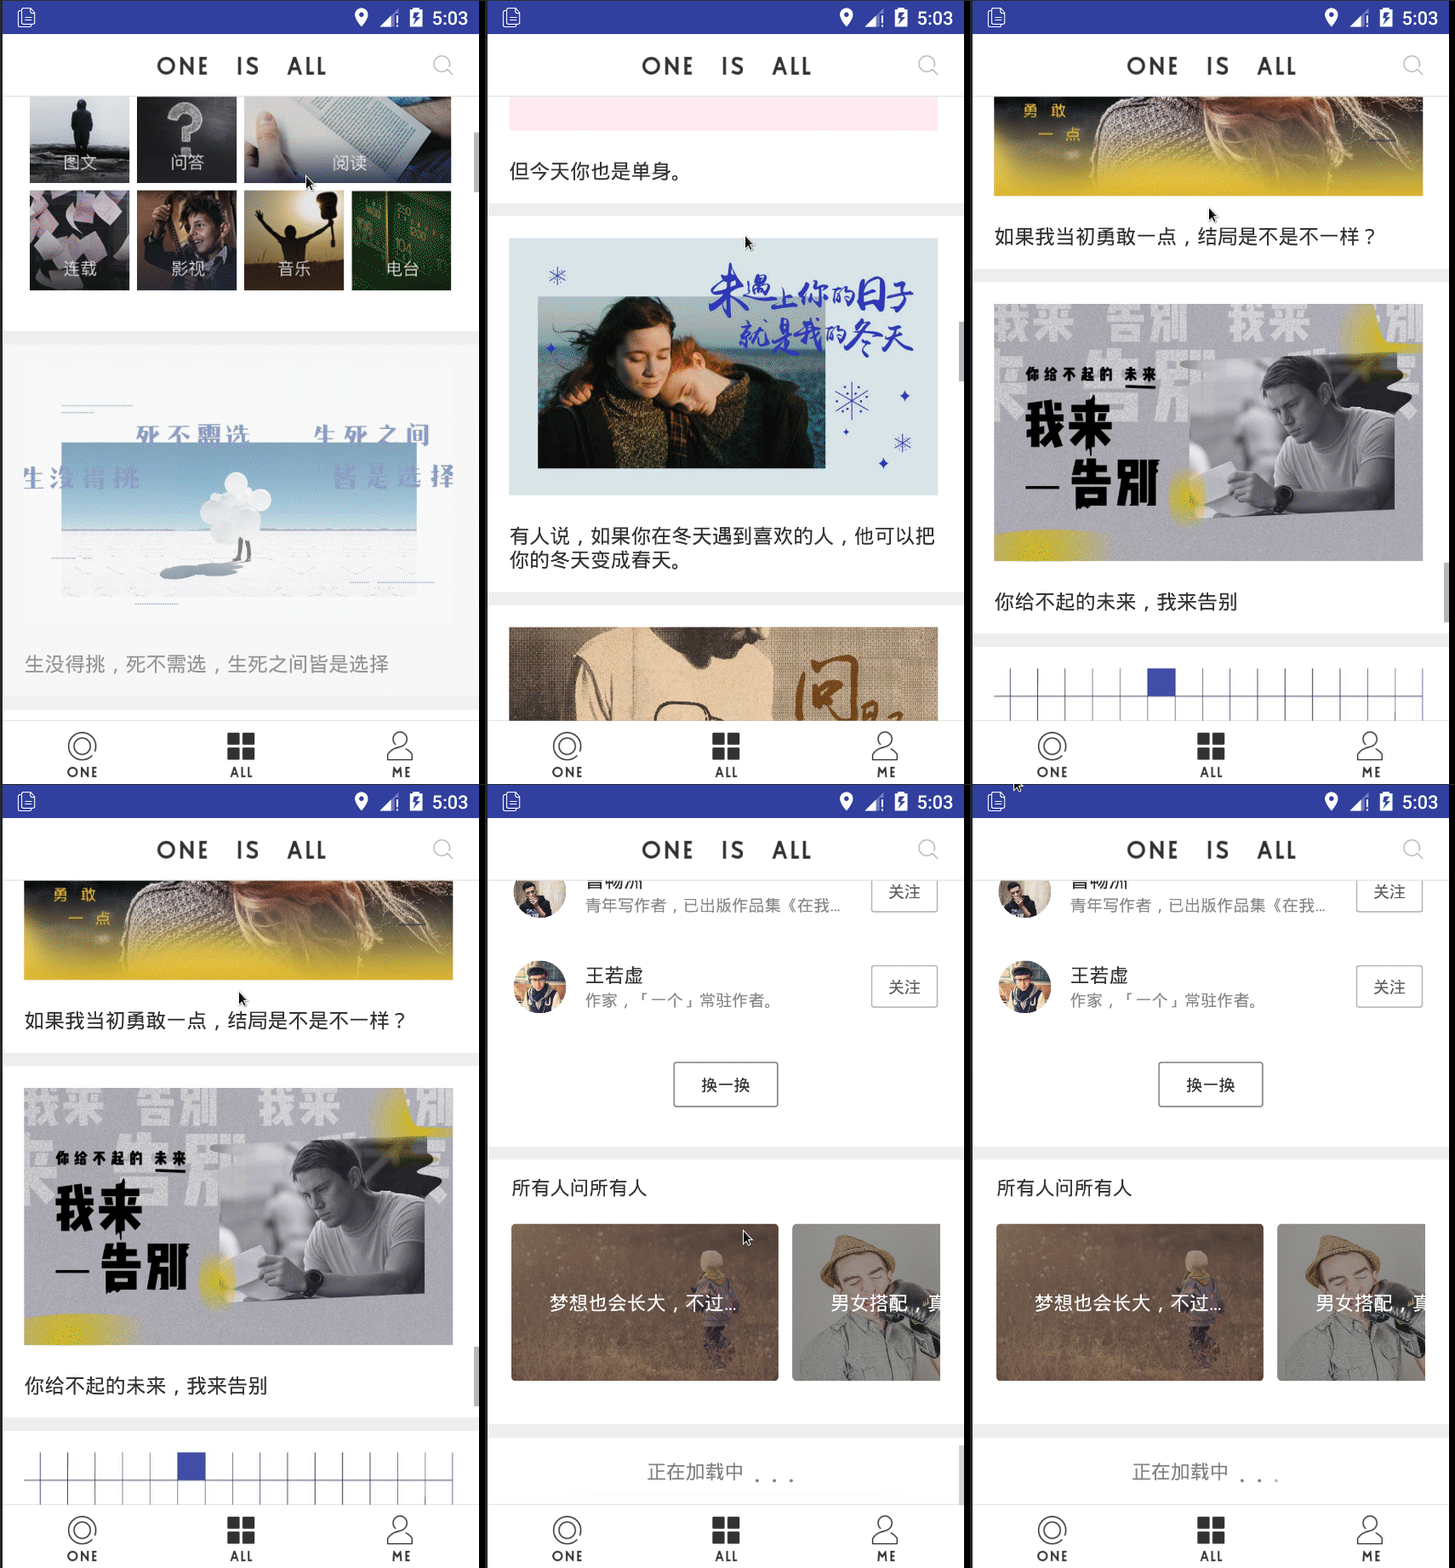
当前的效果图gif:


要实现下拉刷新和加载更多,需要对scrollview做一个扩展,对scrollview的滑动事件做监听和逻辑处理,利用官方的PanResponder 做手势识别,显示一个自定义的顶部下拉刷新视图,所以我们可以利用react-native现有的组件封装一个支持下拉刷新和加载更多的view来实现我们的需求。这里我们定义下拉刷新的动画是一个常见的图片旋转+文字提示。
首先,定义下拉到位时距离顶部的高度,默认下拉到位的时长,默认顶部刷新视图的高度,下拉刷新提示文字的显示状态,主要是4个状态,默认状态,正在下拉状态,下拉到位状态,和下拉释放状态。
1
2
3
4
5
6
7
8
9
| const defaultDuration = 300;
const defaultState = {pulling: false, pullok: false, pullrelease: false};
const statePulling = {pulling: true, pullok: false, pullrelease: false};
const statePullok = {pulling: false, pullok: true, pullrelease: false};
const statePullrelease = {pulling: false, pullok: false, pullrelease: true};
|
接下来是定义手势判断
1
2
3
4
5
6
7
8
9
10
11
12
|
const isDownGesture = (x, y) => {
return y > 0 && (y > Math.abs(x));
};
const isUpGesture = (x, y) => {
return y < 0 && (Math.abs(x) < Math.abs(y));
};
const isVerticalGesture = (x, y) => {
return (Math.abs(x) < Math.abs(y));
};
|
定义我们自定义的组件PullScollView继承自Component,定义默认值,传参类型,在构造函数中初始化
1
2
3
4
5
6
7
8
9
10
11
12
13
14
15
16
17
18
19
20
21
22
23
24
25
26
27
28
29
30
31
32
33
34
35
36
37
38
39
40
41
42
43
44
45
46
47
48
49
50
51
52
53
| static defaultProps = {
topRefreshHeight: 50,
pullOkMargin:100
}
static propTypes = {
topRefreshHeight: PropTypes.number,
pullOkMargin: PropTypes.number,
onPulling: PropTypes.func,
onPullOk: PropTypes.func,
onPullRelease: PropTypes.func,
onLoadMore: PropTypes.func,
onScroll: PropTypes.func,
children: PropTypes.array,
style: PropTypes.object,
loadMoreState: PropTypes.number,
onRetry: PropTypes.func,
}
constructor(props) {
super(props)
this.defaultScrollEnabled = false
this.topRefreshHeight = this.props.topRefreshHeight
this.defaultXY = {x: 0, y: this.topRefreshHeight * -1}
this.pullOkMargin = this.props.pullOkMargin
this.state = Object.assign({}, props, {
pullPan: new Animated.ValueXY(this.defaultXY),
scrollEnabled: this.defaultScrollEnabled,
height: 0,
})
this.onScroll = this.onScroll.bind(this)
this.onLayout = this.onLayout.bind(this)
this.isPullState = this.isPullState.bind(this)
this.resetDefaultXYHandler = this.resetDefaultXYHandler.bind(this)
this.resolveHandler = this.resolveHandler.bind(this)
this.renderTopRefresh = this.renderTopRefresh.bind(this)
this.defaultTopRefreshRender = this.defaultTopRefreshRender.bind(this)
this.panResponder = PanResponder.create({
onMoveShouldSetPanResponder: this.onShouldSetPanResponder.bind(this),
onPanResponderMove: this.onPanResponderMove.bind(this),
onPanResponderRelease: this.onPanResponderRelease.bind(this),
})
this.setPullState(defaultState)
}
|
PanResponder手势响应回调中的处理
1
2
3
4
5
6
7
8
9
10
11
12
13
|
onShouldSetPanResponder(e, gesture) {
if (!isVerticalGesture(gesture.dx, gesture.dy)) {
return false;
}
if (!this.state.scrollEnabled) {
this.lastY = this.state.pullPan.y._value;
return true;
} else {
return false;
}
}
|
PanResponder手势移动回调中的处理
1
2
3
4
5
6
7
8
9
10
11
12
13
14
15
16
17
18
19
20
21
22
23
24
25
26
27
28
29
30
|
onPanResponderMove(e, gesture) {
if (isUpGesture(gesture.dx, gesture.dy)) {
if(this.isPullState()) {
this.resetDefaultXYHandler();
} else {
this.scroll.scrollTo({x:0, y: gesture.dy * -1});
}
return;
} else if (isDownGesture(gesture.dx, gesture.dy)) {
this.state.pullPan.setValue({x: this.defaultXY.x, y: this.lastY + gesture.dy / 2});
if (gesture.dy < this.topRefreshHeight + this.pullOkMargin) {
if (!this.curState.pulling) {
this.props.onPulling && this.props.onPulling();
}
this.setPullState(statePulling);
} else {
if (!this.state.pullok) {
this.props.onPullOk && this.props.onPullOk();
}
this.setPullState(statePullok);
}
}
}
|
PanResponder手势释放回调中的处理
1
2
3
4
5
6
7
8
9
10
11
12
13
14
15
16
17
18
19
20
21
22
23
24
25
26
27
|
onPanResponderRelease() {
if (this.curState.pulling) {
this.resetDefaultXYHandler();
}
if (this.curState.pullok) {
if (!this.curState.pullrelease) {
if (this.props.onPullRelease) {
this.props.onPullRelease(this.resolveHandler);
} else {
setTimeout(() => {this.resetDefaultXYHandler()}, 3000);
}
}
this.setPullState(statePullrelease);
Animated.timing(this.state.pullPan, {
toValue: {x: 0, y: 0},
easing: Easing.linear,
duration: defaultDuration
}).start();
this.spin();
}
}
|
下拉重置,注意这里需要停止转圈的动画,根据当前剩余的变化值去初始化动画,如果没有这个操作,可能导致后面几次下拉刷新显示的刷新视图动画异常。
1
2
3
4
5
6
7
8
9
10
11
12
13
14
15
16
17
18
19
20
21
|
resolveHandler() {
if (this.curState.pullrelease) {
this.resetDefaultXYHandler();
}
}
resetDefaultXYHandler() {
this.curState = defaultState;
this.state.pullPan.setValue(this.defaultXY);
this.state.spinValue.stopAnimation(value => {
console.log('剩余时间' + (1 - value) * 3000);
this.animation = Animated.timing(this.state.spinValue, {
toValue: 1,
duration: (1 - value) * 3000,
easing: Easing.linear,
});
});
}
|
实现刷新视图中的循环转圈动画
1
2
3
4
5
6
7
8
9
10
11
12
13
14
15
16
17
18
|
spin () {
this.animation.start((result)=>{
if (Boolean(result.finished)) {
this.animation = Animated.timing(
this.state.spinValue,
{
toValue: 1,
duration: 3000,
easing: Easing.linear
}
);
this.state.spinValue.setValue(0);
this.spin();
}
});
}
|
我们仍然需要对scrollview的滑动事件做一个监听,这里我们需要过滤一个临界状态,当列表已经滑动到顶部,但还没有触发下拉刷新的状态,不允许继续滚动。滑动监听实现加载更多,先获取到垂直方向的滑动距离,列表的高度,内容的高度,当滑出去的距离加上列表的高度大于等于内容高度时触发加载更多,这里给个20的偏移量。
1
2
3
4
5
6
7
8
9
10
11
12
13
14
15
16
17
18
19
20
21
|
onScroll(e) {
if (e.nativeEvent.contentOffset.y <= 0) {
this.setState({scrollEnabled: this.defaultScrollEnabled})
} else if (!this.isPullState()) {
this.setState({scrollEnabled: true})
}
let y = e.nativeEvent.contentOffset.y;
let height = e.nativeEvent.layoutMeasurement.height;
let contentHeight = e.nativeEvent.contentSize.height;
if (y + height >= contentHeight - 20) {
console.log('触发加载更多');
this.props.onLoadMore && this.props.onLoadMore()
}
this.props.onScroll && this.props.onScroll(e)
}
|
处于下拉过程判断
1
2
3
4
|
isPullState() {
return this.curState.pulling || this.curState.pullok || this.curState.pullrelease;
}
|
设置当前处于的下拉状态
1
2
3
4
5
6
7
|
setPullState(pullState) {
if (this.curState !== pullState) {
this.curState = pullState;
this.renderTopRefresh();
}
}
|
根据当前的下拉状态,完成下拉刷新部分的重绘:
1
2
3
4
5
6
7
8
9
10
11
12
13
14
15
16
17
18
19
20
21
22
23
24
25
26
27
28
29
30
31
32
33
34
35
36
37
38
39
40
41
42
43
44
45
46
47
48
49
50
51
52
53
|
renderTopRefresh() {
let { pulling, pullok, pullrelease } = this.curState;
return this.defaultTopRefreshRender(pulling, pullok, pullrelease);
}
defaultTopRefreshRender(pulling, pullok, pullrelease) {
setTimeout(() => {
if (pulling) {
this.txtPulling && this.txtPulling.setNativeProps({style: styles.show});
this.txtPullok && this.txtPullok.setNativeProps({style: styles.hide});
this.txtPullrelease && this.txtPullrelease.setNativeProps({style: styles.hide});
} else if (pullok) {
this.txtPulling && this.txtPulling.setNativeProps({style: styles.hide});
this.txtPullok && this.txtPullok.setNativeProps({style: styles.show});
this.txtPullrelease && this.txtPullrelease.setNativeProps({style: styles.hide});
} else if (pullrelease) {
this.txtPulling && this.txtPulling.setNativeProps({style: styles.hide});
this.txtPullok && this.txtPullok.setNativeProps({style: styles.hide});
this.txtPullrelease && this.txtPullrelease.setNativeProps({style: styles.show});
}
}, 1);
const spin = this.state.spinValue.interpolate({
inputRange: [0, 1],
outputRange: ['0deg', '1080deg']
});
return (
<View style={{flexDirection: 'row', justifyContent: 'center', alignItems: 'center', height: defaultTopRefreshHeight}}>
<Animated.Image
style={{
width: 23,
height: 23,
transform: [{rotate: spin}] ,
position:'absolute',
left:24
}}
source={{uri: 'default_ptr_rotate'}}
/>
<Text ref={(c) => {this.txtPulling = c;}} style={styles.hide}>{tipText.pulling}</Text>
<Text ref={(c) => {this.txtPullok = c;}} style={styles.hide}>{tipText.pullok}</Text>
<Text ref={(c) => {this.txtPullrelease = c;}} style={styles.hide}>{tipText.pullrelease}</Text>
</View>
);
}
|
测量宽高,动态设置自定义view的宽高,绘制整个自定义view以及该组件内部包含的子view
1
2
3
4
5
6
7
8
9
10
11
12
13
14
15
16
17
18
19
20
21
22
23
24
25
26
27
28
29
30
31
32
33
|
onLayout(e) {
if (this.state.width !== e.nativeEvent.layout.width || this.state.height !== e.nativeEvent.layout.height) {
this.scrollContainer.setNativeProps({style: {width: e.nativeEvent.layout.width, height: e.nativeEvent.layout.height}});
this.width = e.nativeEvent.layout.width;
this.height = e.nativeEvent.layout.height;
}
}
render() {
return (
<View style={[Refresh.styles.wrap, this.props.style]} onLayout={this.onLayout}>
<Animated.View style={[this.state.pullPan.getLayout()]}>
{}
{this.renderTopRefresh()}
{}
<View ref={(c) => {
this.scrollContainer = c
}} {...this.panResponder.panHandlers} style={{width: this.state.width, height: this.state.height}}>
<ScrollView {...this.props} ref={(c) => {
this.scroll = c
}} scrollEnabled={this.state.scrollEnabled} onScroll={this.onScroll}>
{this.props.children}
{}
<LoadMore state={this.props.loadMoreState} onRetry={() => this.props.onRetry()}/>
</ScrollView>
</View>
</Animated.View>
</View>
)
}
|
设置默认提示文本和自带样式
1
2
3
4
5
6
7
8
9
10
11
12
13
14
15
16
17
18
19
20
21
22
23
24
|
const tipText = {
pulling: "下拉刷新...",
pullok: "松开刷新......",
pullrelease: "刷新中......"
};
const styles = StyleSheet.create({
wrap: {
flex: 1,
flexGrow: 1,
flexDirection: 'column',
zIndex:-999,
},
hide: {
position: 'absolute',
left: 10000
},
show: {
position: 'relative',
left: 0
}
});
|
在业务代码中使用
1
2
3
4
| <PullScrollView style={{flex: 1, backgroundColor: 'white'}}
onPullRelease={this.onPullRelease}>
...
</PullScollView>
|
这里注意在onPullRelease中一定要调用resolve()让下拉刷新重置
1
2
3
4
5
6
| onPullRelease(resolve) {
setTimeout(() => {
resolve();
}, 3000);
}
|
我们需要在触发加载更多,发起网络请求时显示一个加载更多的loadingview,通过loading参数传值控制当前是否显示,同样简单封装一下,这里加了一个逐个展示小圆点的组合动画
1
2
3
4
5
6
7
8
9
10
11
12
13
14
15
16
17
18
19
20
21
22
23
24
25
26
27
28
29
30
31
32
33
34
35
36
37
38
39
40
41
42
43
44
45
46
47
48
49
50
51
52
53
54
55
56
57
58
59
60
61
62
63
64
65
66
67
68
69
70
71
72
73
74
75
76
77
78
79
80
81
82
83
84
85
86
87
88
89
90
91
92
93
94
95
96
97
98
99
100
101
102
103
104
105
106
107
108
109
110
111
112
113
114
115
116
117
118
119
120
121
122
123
124
125
126
127
128
129
130
131
132
133
134
135
136
137
138
139
140
141
142
143
144
145
146
147
148
149
150
151
152
153
154
155
156
157
158
159
160
161
162
163
164
165
166
167
168
169
170
171
172
173
174
175
176
177
178
179
180
181
182
| const pointsNum = 3;
class LoadMore extends Component {
constructor(props) {
super(props)
this.arr = []
for (let i = 0; i < pointsNum; i++) {
this.arr.push(i)
}
this.animatedValue = []
this.arr.forEach((value) => {
this.animatedValue[value] = new Animated.Value(0)
})
this.state = {
curState: this.props.state
}
}
componentDidMount(){
this.isMount = true
}
componentWillUnmount(){
this.isMount = false
}
animate() {
this.arr.forEach((value) => {
this.animatedValue[value].setValue(0);
})
const animations = this.arr.map((item) => {
return Animated.timing(
this.animatedValue[item],
{
toValue: 1,
duration: 200,
easing: Easing.linear
}
)
})
this.loadingAnim = Animated.sequence(animations)
this.loadingAnim.start((result) => {
if (Boolean(result.finished)) this.animate()
})
}
render() {
return (
<View style={[styles.container]}>
{this.state.curState !== LoadMoreState.state.hide ? this.renderLoad() : null}
</View>
)
}
componentWillReceiveProps(nextProps) {
this.setState({
curState: nextProps.state
})
switch (nextProps.state) {
case LoadMoreState.state.loading:
if (this.props.loadAnim){
this.animate()
}
break
case LoadMoreState.state.hide:
this.arr.forEach((item) => {
this.animatedValue[item].stopAnimation(value => {
// console.log('剩余时间' + (1 - value) * 200);
});
})
break
case LoadMoreState.state.noMore:
setTimeout(() => {
if(this.isMount){
this.setState({
curState: LoadMoreState.state.hide
})
}
}, 3000)
break
}
}
/**
* 根据状态返回绘制文字
* @returns {string}
*/
renderLoadText() {
switch (this.state.curState) {
case LoadMoreState.state.loading:
if (this.props.loadAnim){
return LoadMoreState.stateText.loading
}else{
return LoadMoreState.stateText.loading + '...'
}
case LoadMoreState.state.noMore:
return LoadMoreState.stateText.noMore
case LoadMoreState.state.tip:
return LoadMoreState.stateText.tip
case LoadMoreState.state.error:
return LoadMoreState.stateText.error
}
}
// 绘制文字
renderLoad() {
const animations = this.arr.map((value, index) => {
return (
<Animated.Text key={index} style={{
opacity: this.animatedValue[value], fontSize: Config.screenW * 0.06, color: Config.normalTextColor
}}>.</Animated.Text>
)
})
return (
<TouchableOpacity
style={{flexDirection: 'row', alignItems: 'center', height: Config.screenW * 0.14,}}
onPress={() => new DoubleClick().filterDoubleClick(
function () {
if (this.state.curState === LoadMoreState.state.error){
this.props.onRetry && this.props.onRetry()
this.setState({
curState:LoadMoreState.state.loading
})
this.animate()
}
}.bind(this)
)}>
<Text style={{
color: Config.normalTextColor,
fontSize: Config.screenW * 0.04,
marginRight: Config.screenW * 0.02,
}}>
{this.renderLoadText()}
</Text>
{/*是加载状态绘制。。。的动画*/}
{this.state.curState === LoadMoreState.state.loading ?
<View style={styles.pointsView}>
{animations}
</View> : null}
</TouchableOpacity>
)
}
}
LoadMore.propTypes = {
state: PropTypes.number, //当前状态
onRetry: PropTypes.func ,//重试回调
loadAnim: PropTypes.bool, //是否显示加载动画,flatlist尾部组件不支持
}
LoadMore.defaultProps = {
state: LoadMoreState.state.hide, //默认不显示
loadAnim: false //默认不用动画
}
const styles = StyleSheet.create({
container: {
flex: 1,
justifyContent: 'center',
alignItems: 'center',
},
pointsView: {
height: Config.screenW * 0.14,
flexDirection: 'row',
alignItems: 'center',
},
instructions: {
textAlign: 'center',
color: '#333333',
marginBottom: 5,
},
})
export default LoadMore;
|
对flatlist封装
封装flatlist实现下拉刷新和加载更多
与scrollview的封装方式大致相同,render方法需要稍做修改
1
2
3
4
5
6
7
8
9
10
11
12
13
14
15
16
17
18
19
20
21
22
23
24
25
26
27
28
| render() {
return (
<View style={[Refresh.styles.wrap, this.props.style]} onLayout={this.onLayout}>
<Animated.View style={[this.state.pullPan.getLayout()]}>
{}
{this.renderTopRefresh()}
{}
<View ref={(c) => {
this.scrollContainer = c
}} {...this.panResponder.panHandlers} style={{width: this.state.width, height: this.state.height}}>
<FlatList
ref={(c) => {
this.list = c
}}
extraData={this.state}
{...this.props}
onScroll={this.onScroll}
scrollEnabled={this.state.scrollEnabled}
ListFooterComponent={() => {
return <LoadMore state={this.props.loadMoreState} onRetry={() => this.props.onRetry()}/>
}}
/>
</View>
</Animated.View>
</View>
)
}
|
在业务代码中使用
1
2
3
4
5
6
7
8
9
10
11
12
| <PullFlatList
data={this.state.data.data}
showsVerticalScrollIndicator={false}
ItemSeparatorComponent={this.space}
renderItem={({item, index}) => (
<ComicImg imgUrl={item} index={index}/>
)}
keyExtractor={item => item}
numColumns={1}
onPullRelease={this.props.onRefresh}
style={[CommonStyle.styles.listView,{width: Config.screenW,height:Config.screenH}]}
/>
|
对应的源码地址:
组件封装
组件使用

