google在Android support v7包中提供了SearchView,开放的方法很少,导致SearchView自定义比较麻烦。但是SearchView往往是业务中常用的控件,其实实现也很简单,可以自己动手打造一个易扩展,可自定义的SearchView,来满足以后项目中的需求,下面就记录一下封装SearchView的详细过程。
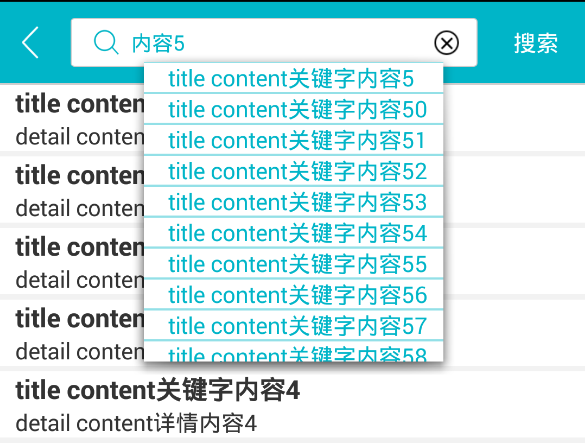
最终效果gif:
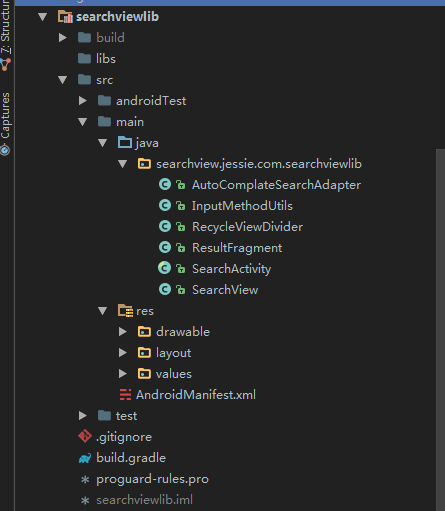
这是封装好的lib库,上图
封装searchview lib 新建一个项目,具体过程不描述了,新建一个module,选择android libiary,填写好相关信息后finish。
1
2
3
4
@Override public void setOnKeyListener (OnKeyListener l) et.setOnKeyListener(l); }
并向外暴露接口
1
2
3
4
public interface searchEvent void onSearch () void back () }
注册方法
1 2 3 4 5 public SearchView setSearchEvent (SearchView.searchEvent searchEvent) this .searchEvent = searchEvent; return this ; }
执行回调并隐藏软键盘
1
2
3
4
5
6
7
8
9
10
11
12
@Override public boolean onKey (View v, int keyCode, KeyEvent event) if (event != null && (keyCode == KeyEvent.KEYCODE_ENTER || keyCode == KeyEvent.KEYCODE_ENVELOPE) && event.getRepeatCount() == 0 && event.getAction() == KeyEvent.ACTION_UP) { searchEvent.onSearch(); InputMethodUtils.hideKeyBoard(et); return true ; } return false ; }
首先我们要自定义searchview的布局,布局文件如下:
1
2
3
4
5
6
7
8
9
10
11
12
13
14
15
16
17
18
19
20
21
22
23
24
25
26
27
28
29
30
31
32
33
34
35
36
37
38
39
40
41
42
43
44
45
46
47
48
49
50
51
52
53
54
55
56
57
58
59
60
61
62
63
64
65
66
67
68
69
70
71
72
73
74
75
76
77
78
79
80
81
82
83
84
85
86
<?xml version="1.0" encoding="utf-8"?> <LinearLayout android:id ="@+id/lay_content_search" xmlns:android ="http://schemas.android.com/apk/res/android" android:layout_width ="match_parent" android:layout_height ="50dp" android:background ="@color/default_blue" android:orientation ="horizontal" android:gravity ="center_vertical" android:paddingBottom ="5dp" android:paddingTop ="5dp" > <ImageView android:id ="@+id/iv_back" android:padding ="10dp" android:layout_marginLeft ="4dp" android:layout_width ="30dp" android:scaleType ="centerCrop" android:layout_height ="match_parent" android:layout_centerVertical ="true" android:src ="@drawable/ic_title_back_white" /> <RelativeLayout android:layout_width ="match_parent" android:layout_height ="30dp" android:layout_weight ="1" android:layout_marginLeft ="10dp" android:layout_marginRight ="6dp" android:background ="@drawable/mask_round_rim_circle_gray" > <ImageView android:id ="@+id/iv_tag" android:layout_width ="20dp" android:layout_height ="20dp" android:layout_alignParentLeft ="true" android:layout_centerVertical ="true" android:layout_marginLeft ="8dp" android:scaleType ="centerCrop" android:src ="@drawable/ic_content_search" /> <AutoCompleteTextView android:id ="@+id/et_content_search" android:layout_width ="match_parent" android:layout_height ="match_parent" android:layout_centerHorizontal ="true" android:layout_centerVertical ="true" android:layout_marginLeft ="5dp" android:layout_toRightOf ="@+id/iv_tag" android:background ="@null" android:ems ="10" android:hint ="@string/hint_input_search" android:imeOptions ="actionSearch" android:textCursorDrawable ="@drawable/cursor_blue" android:inputType ="text" android:maxLines ="1" android:textColor ="@color/default_blue" android:textColorHint ="@color/default_et_hint" android:textSize ="13sp" > <requestFocus /> </AutoCompleteTextView > <ImageView android:id ="@+id/iv_del_content" android:layout_width ="30dp" android:layout_height ="match_parent" android:layout_alignParentRight ="true" android:layout_centerVertical ="true" android:scaleType ="centerCrop" android:src ="@drawable/sl_del_content" android:visibility ="gone" /> </RelativeLayout > <Button android:id ="@+id/btn_content_search" android:layout_width ="60dp" android:layout_height ="wrap_content" android:background ="@null" android:text ="@string/text_search" android:textSize ="14sp" android:textColor ="@color/white" /> </LinearLayout >
效果如图:
1 2 3 4 5 6 7 8 9 10 11 12 13 14 15 16 17 18 19 20 21 22 23 24 25 26 27 28 29 30 31 32 33 34 35 36 37 38 39 40 41 42 43 44 45 46 47 48 49 50 51 52 53 54 55 56 57 58 59 60 61 62 63 64 65 public SearchView setIntervalTime (int intervalTime) this .intervalTime=intervalTime; return this ; } public SearchView setBackGroundColor (int color) layContentSearch.setBackgroundColor(color); return this ; } public SearchView setBackIcon (int resId) iback.setImageResource(resId); return this ; } public SearchView setTagIcon (int resId) ivTag.setImageResource(resId); return this ; } public SearchView setDelIcon (int resId) ib.setImageResource(resId); return this ; } public SearchView setSearchText (String text) search.setText(text); return this ; } public SearchView setSearchTextColor (int color) search.setTextColor(color); return this ; } public SearchView setSearchBackground (int resId) search.setBackgroundResource(resId); return this ; } public SearchView setSearchBackgroundColor (int color) search.setBackgroundColor(color); return this ; } public SearchView setSearchHintText (String hintText) search.setHint(hintText); return this ; } public SearchView setSearchHintTextColor (int color) search.setHintTextColor(color); return this ; }
为了方便我们在xml中直接进行自定义,可以新建一些自定义的属性:
1
2
3
4
5
6
7
8
9
10
11
12
13
14
15
16
17
18
19
<?xml version="1.0" encoding="utf-8"?> <resources > <declare-styleable name ="SearchView" > <attr name ="intervalTime" format ="integer" /> <attr name ="backgroundColor" format ="color" /> <attr name ="backIcon" format ="reference" /> <attr name ="tagIcon" format ="reference" /> <attr name ="delIcon" format ="reference" /> <attr name ="searchText" format ="string" /> <attr name ="searchTextColor" format ="color" /> <attr name ="searchBackground" format ="reference" /> <attr name ="searchBackgroundColor" format ="color" /> <attr name ="searchHintText" format ="string" /> <attr name ="searchHintTextColor" format ="color" /> </declare-styleable > </resources >
在searchview初始化时,载入布局,初始化子view,读取自定义属性:
1
2
3
4
5
6
7
8
9
10
11
12
13
14
15
16
17
18
19
public SearchView (Context context, AttributeSet attrs) super (context, attrs); handler=new Handler(); LayoutInflater.from(context).inflate(R.layout.widget_search_et_btn, this , true ); TypedArray a = context.obtainStyledAttributes(attrs, R.styleable.SearchView); initView(); intervalTime=a.getInt(R.styleable.SearchView_intervalTime,1000 ); setBackGroundColor(a.getColor(R.styleable.SearchView_backgroundColor,getResources().getColor(R.color.default_blue))); setBackIcon(a.getResourceId(R.styleable.SearchView_backIcon,R.drawable.ic_title_back_white)); setTagIcon(a.getResourceId(R.styleable.SearchView_tagIcon,R.drawable.ic_content_search)); setDelIcon(a.getResourceId(R.styleable.SearchView_delIcon,R.drawable.sl_del_content)); setSearchText(a.getString(R.styleable.SearchView_searchText)); setSearchTextColor(a.getColor(R.styleable.SearchView_searchTextColor,getResources().getColor(R.color.white))); setSearchBackground(a.getResourceId(R.styleable.SearchView_searchBackground,android.R.color.transparent)); setSearchBackgroundColor(a.getColor(R.styleable.SearchView_searchBackgroundColor,getResources().getColor(android.R.color.transparent))); setSearchHintText(a.getString(R.styleable.SearchView_searchHintText)); setSearchHintTextColor(a.getColor(R.styleable.SearchView_searchHintTextColor,getResources().getColor(R.color.default_line))); }
1 2 3 4 5 6 7 8 9 10 11 12 13 14 15 16 17 18 19 20 21 22 23 24 25 26 27 28 29 30 31 32 33 34 35 36 37 38 39 40 41 42 43 44 45 46 47 48 49 50 51 52 53 54 55 56 57 TextWatcher tw = new TextWatcher() { @Override public void onTextChanged (CharSequence s, int start, int before, int count) } @Override public void beforeTextChanged (CharSequence s, int start, int count, int after) } @Override public void afterTextChanged (Editable s) if (s.length() == 0 ) { hideBtn(); } else { showBtn(); } if (System.currentTimeMillis() - lastTime > intervalTime) { handler.postDelayed(new Runnable() { @Override public void run () searchEvent.onSearch(); } }, intervalTime); lastTime=System.currentTimeMillis(); } } }; private void hideBtn () if (ib.isShown()) ib.setVisibility(View.GONE); } private void showBtn () if (!ib.isShown()) ib.setVisibility(View.VISIBLE); } ib.setOnClickListener(new OnClickListener() { @Override public void onClick (View v) hideBtn(); et.setText("" ); } });
关于搜索文字补全,这里是给AutoCompleteTextView添加了一个适配器,需要继承BaseAdapter,并实现Filterable接口,具体实现如下:
1
2
3
4
5
6
7
8
9
10
11
12
13
14
15
16
17
18
19
20
21
22
23
24
25
26
27
28
29
30
31
32
33
34
35
36
37
38
39
40
41
42
43
44
45
46
47
48
49
50
51
52
53
54
55
56
57
58
59
60
61
62
63
64
65
66
67
68
69
70
71
72
73
74
75
76
77
78
79
80
81
82
83
84
85
86
87
88
89
90
91
92
93
94
95
96
97
98
99
100
101
102
103
104
105
106
107
public class AutoComplateSearchAdapter extends BaseAdapter implements Filterable private ArrayFilter mFilter;private ArrayList<String> keyList;private Context context;private ArrayList<String> mUnfilteredData;public AutoComplateSearchAdapter (Context context,ArrayList<String> keyList) this .context = context; this .keyList = keyList; } @Override public int getCount () return keyList.size(); } @Override public Object getItem (int position) return keyList.get(position); } @Override public long getItemId (int position) return position; } @Override public View getView (int position, View convertView, ViewGroup parent) View view; ViewHolder holder; if (convertView == null ) { view = View.inflate(context, R.layout.adapter_auto, null ); holder = new ViewHolder(); holder.tv_name = (TextView) view.findViewById(R.id.item_auto_txt); holder.lineTop = (ImageView) view.findViewById(R.id.item_auto_line_top); holder.lineBottom = (ImageView) view.findViewById(R.id.item_auto_line_bottom); view.setTag(holder); } else { view = convertView; holder = (ViewHolder) view.getTag(); } String key = keyList.get(position); holder.tv_name.setText(key); return view; } static class ViewHolder public TextView tv_name; public ImageView lineTop; public ImageView lineBottom; } @Override public Filter getFilter () if (mFilter == null ) { mFilter = new ArrayFilter(); } return mFilter; } private final Object mLock = new Object();private class ArrayFilter extends Filter @Override protected FilterResults performFiltering (CharSequence prefix) FilterResults results = new FilterResults(); if (mUnfilteredData == null ) { synchronized (mLock) { mUnfilteredData = new ArrayList<String>(keyList); } } if (prefix == null || prefix.length() == 0 ) { results.values = mUnfilteredData; results.count = mUnfilteredData.size(); } else { String prefixString = prefix.toString().toLowerCase(); ArrayList<String> newValues = new ArrayList<String>(mUnfilteredData.size()); for (int i = 0 ; i < mUnfilteredData.size(); i++) { String str = mUnfilteredData.get(i); if (!TextUtils.isEmpty(str) && !TextUtils.isEmpty(prefixString) && str.contains(prefixString)) { newValues.add(str); } } results.values = newValues; results.count = newValues.size(); } return results; } @Override protected void publishResults (CharSequence constraint, FilterResults results) keyList = (ArrayList<String>) results.values; if (results.count > 0 ) { notifyDataSetChanged(); } else { notifyDataSetInvalidated(); } } } }
自动补全列表的布局也很简单,相当于list的item:
1
2
3
4
5
6
7
8
9
10
11
12
13
14
15
16
17
18
19
20
21
22
23
24
25
26
27
28
29
30
31
32
<?xml version="1.0" encoding="utf-8"?> <RelativeLayout xmlns:android ="http://schemas.android.com/apk/res/android" android:layout_width ="match_parent" android:layout_height ="35dp" android:background ="@color/white" > <ImageView android:id ="@+id/item_auto_line_top" android:layout_width ="match_parent" android:layout_height ="2px" android:layout_alignParentTop ="true" android:background ="#6c01b5c6" /> <TextView android:id ="@+id/item_auto_txt" android:layout_width ="wrap_content" android:layout_height ="wrap_content" android:layout_marginLeft ="15dp" android:layout_centerVertical ="true" android:text ="cnsio" android:textColor ="@color/default_blue" android:textSize ="14sp" /> <ImageView android:id ="@+id/item_auto_line_bottom" android:layout_width ="match_parent" android:layout_height ="2px" android:layout_alignParentBottom ="true" android:background ="#6c01b5c6" /> </RelativeLayout >
1
2
3
4
5
6
7
8
9
10
11
12
13
14
15
16
17
18
19
20
21
22
23
24
25
26
27
28
29
30
31
32
33
34
35
36
37
38
39
40
41
42
43
44
45
46
47
48
49
50
51
52
53
54
55
56
protected SearchView searchView;protected ResultFragment resultFragment;protected abstract void doSearch () protected abstract RecyclerView.Adapter setResultListAdapter () ;protected String getSearchContent () return searchView.getText().toString().trim(); } protected void findSearchView (int searchViewId) searchView = (SearchView) this .findViewById(searchViewId); searchView.setSearchEvent(new SearchView.searchEvent() { @Override public void onSearch () doSearch(); } @Override public void back () finish(); } }); } protected void setKeyListAdapter (ArrayList<String> keyList) searchView.setKeyListAdapter(keyList); } protected RecyclerView.ItemDecoration setResultListDivider () { return new RecycleViewDivider(this , LinearLayoutManager.HORIZONTAL, 10 , getResources().getColor(R.color.bg)); } protected RecyclerView.LayoutManager setLayoutManager () { return new LinearLayoutManager(this ); } protected void initResultFragment (int SearchFragmentId) resultFragment = new ResultFragment(); FragmentTransaction transaction = getSupportFragmentManager().beginTransaction(); transaction.replace(SearchFragmentId, resultFragment); transaction.commit(); }
1 2 3 4 5 6 7 8 9 10 11 12 13 14 15 16 17 18 19 20 21 22 23 24 25 26 27 28 29 30 31 32 33 34 35 36 37 38 39 40 41 42 43 44 45 46 47 48 49 50 51 52 53 54 55 56 57 58 59 60 61 62 63 64 65 66 67 68 69 70 71 72 73 74 75 76 77 78 79 80 81 82 83 84 85 86 87 88 89 90 91 92 private void clearViewFocus (View v, View... views) if (null != v && null != views && views.length > 0 ) { for (View view : views) { if (v.getId() == view.getId()) { v.setEnabled(false ); break ; } } } } private void getViewFocus (View v, View... views) if (null != v && null != views && views.length > 0 ) { for (View view : views) { if (v.getId() == view.getId()) { v.setEnabled(true ); break ; } } } } private boolean isFocusEditText (View v, View... views) if (v instanceof EditText) { EditText tmp_et = (EditText) v; for (View view : views) { if (tmp_et.getId() == view.getId()) { return true ; } } } return false ; } private boolean isTouchView (View[] views, MotionEvent ev) if (views == null || views.length == 0 ) return false ; int [] location = new int [2 ]; for (View view : views) { view.getLocationOnScreen(location); int x = location[0 ]; int y = location[1 ]; if (ev.getX() > x && ev.getX() < (x + view.getWidth()) && ev.getY() > y && ev.getY() < (y + view.getHeight())) { return true ; } } return false ; } @Override public boolean dispatchTouchEvent (MotionEvent ev) if (ev.getAction() == MotionEvent.ACTION_DOWN) { View v = getCurrentFocus(); if (isTouchView(filterViewByIds(), ev)) return super .dispatchTouchEvent(ev); if (isTouchView(hideSoftByEditViewIds(), ev)){ getViewFocus(v,hideSoftByEditViewIds()); return super .dispatchTouchEvent(ev); } if (hideSoftByEditViewIds() == null || hideSoftByEditViewIds().length == 0 ) return super .dispatchTouchEvent(ev); if (isFocusEditText(v, hideSoftByEditViewIds())) { clearViewFocus(v, hideSoftByEditViewIds()); InputMethodUtils.hideKeyBoard(this ); } } return super .dispatchTouchEvent(ev); } protected View[] hideSoftByEditViewIds() { View[] views = {searchView.getEditView()}; return views; } protected View[] filterViewByIds() { return null ; }
lib库的使用 最后说明一下使用方法,在使用lib库时,需要让搜索界面的activity继承SearchActivity,实现其中的抽象方法:
1 2 3 4 5 6 7 8 9 10 11 12 protected void doSearch () resultListAdapter.setData(search(getSearchContent())); } @Override protected RecyclerView.Adapter setResultListAdapter () { resultListAdapter=new ResultListAdapter(); resultListAdapter.setData(newsDTOs); return resultListAdapter; }
结果列表RecyclerView的Adapter的实现就不赘述了,根据展示的需求自定义,RecyclerView的布局管理器,分割线,隐藏软件盘的view过滤,需要隐藏软键盘的view设置都是可以重写SearchActivity中对应的方法进行自定义。
搜索界面的activity,初始化时需要绑定searchview的id和fragment的容器id
1 2 3 4 initResultFragment(R.id.ll_content); findSearchView(R.id.sc_content);
可以设置searchview自动补全的数据源,自定义ui
1 2 3 4 5 6 7 8 9 10 11 12 13 14 15 16 17 18 setKeyListAdapter(setKeyList()); setSearchView(); public void setSearchView () searchView.setIntervalTime(1000 ) .setBackGroundColor(getResources().getColor(R.color.default_blue)) .setBackIcon(R.drawable.ic_title_back_white) .setTagIcon(R.drawable.ic_content_search) .setDelIcon(R.drawable.sl_del_content) .setSearchText(getString(R.string.text_search)) .setSearchTextColor(getResources().getColor(R.color.white)) .setSearchBackground(getResources().getColor(android.R.color.transparent)) .setSearchBackgroundColor(getResources().getColor(android.R.color.transparent)) .setSearchHintText(getString(R.string.hint_input_search)) .setSearchHintTextColor(getResources().getColor(R.color.default_line)); }
在xml中直接自定义ui
1 2 3 4 5 6 7 8 9 10 11 12 <searchview.jessie.com.searchviewlib.SearchView android:id ="@+id/sc_content" android:layout_width ="match_parent" android:layout_height ="wrap_content" jessie:intervalTime ="2000" jessie:backIcon ="@drawable/ic_title_back_white" jessie:backgroundColor ="@color/default_blue" jessie:tagIcon ="@drawable/ic_content_search" jessie:delIcon ="@drawable/sl_del_content" jessie:searchText ="@string/text_search" jessie:searchTextColor ="@color/white" jessie:searchHintText ="@string/hint_input_search" />
到此,封装自己的searchview就完成了,需要查看完整代码,这里是传送门 。