0%


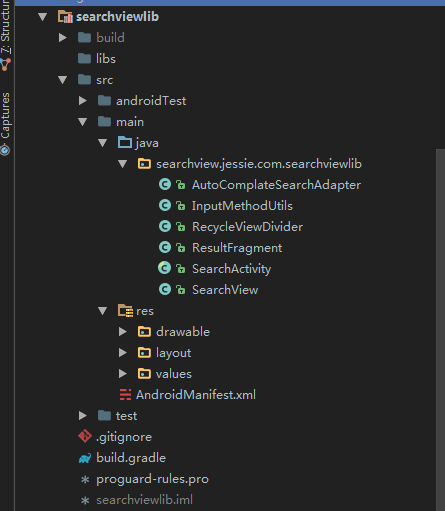
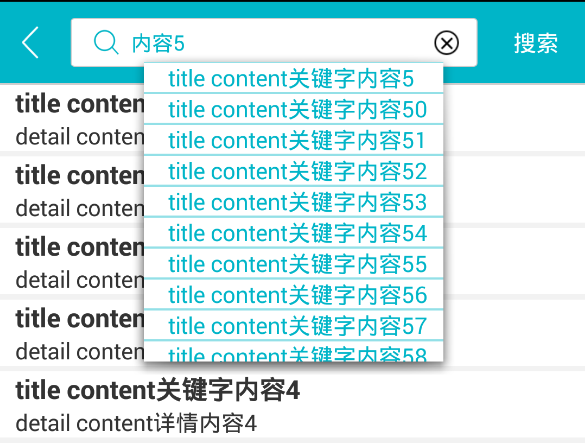
google在Android support v7包中提供了SearchView,开放的方法很少,导致SearchView自定义比较麻烦。但是SearchView往往是业务中常用的控件,其实实现也很简单,可以自己动手打造一个易扩展,可自定义的SearchView,来满足以后项目中的需求,下面就记录一下封装SearchView的详细过程。


最终效果gif:
效果gif

这是封装好的lib库,上图
封装好的lib库截图

封装searchview lib

新建一个项目,具体过程不描述了,新建一个module,选择android libiary,填写好相关信息后finish。
继承LinearLayout实现View.OnKeyListener接口,这里主要是对实现软键盘搜索键的监听。

1
2
3
4
@Override
public void setOnKeyListener(OnKeyListener l) {
et.setOnKeyListener(l);
}

并向外暴露接口

1
2
3
4
public interface searchEvent{
void onSearch();
void back();
}

注册方法

1
2
3
4
5
//实现搜索和返回接口
public SearchView setSearchEvent(SearchView.searchEvent searchEvent) {
this.searchEvent = searchEvent;
return this;
}

执行回调并隐藏软键盘

1
2
3
4
5
6
7
8
9
10
11
12
@Override
public boolean onKey(View v, int keyCode, KeyEvent event) {
if (event != null
&& (keyCode == KeyEvent.KEYCODE_ENTER || keyCode == KeyEvent.KEYCODE_ENVELOPE)
&& event.getRepeatCount() == 0
&& event.getAction() == KeyEvent.ACTION_UP) {
searchEvent.onSearch();
InputMethodUtils.hideKeyBoard(et);
return true;
}
return false;
}

首先我们要自定义searchview的布局,布局文件如下:

1
2
3
4
5
6
7
8
9
10
11
12
13
14
15
16
17
18
19
20
21
22
23
24
25
26
27
28
29
30
31
32
33
34
35
36
37
38
39
40
41
42
43
44
45
46
47
48
49
50
51
52
53
54
55
56
57
58
59
60
61
62
63
64
65
66
67
68
69
70
71
72
73
74
75
76
77
78
79
80
81
82
83
84
85
86
<?xml version="1.0" encoding="utf-8"?>
<LinearLayout android:id="@+id/lay_content_search"
xmlns:android="http://schemas.android.com/apk/res/android"
android:layout_width="match_parent"
android:layout_height="50dp"
android:background="@color/default_blue"
android:orientation="horizontal"
android:gravity="center_vertical"
android:paddingBottom="5dp"
android:paddingTop="5dp">

<ImageView
android:id="@+id/iv_back"
android:padding="10dp"
android:layout_marginLeft="4dp"
android:layout_width="30dp"
android:scaleType="centerCrop"
android:layout_height="match_parent"
android:layout_centerVertical="true"
android:src="@drawable/ic_title_back_white"
/>

<RelativeLayout
android:layout_width="match_parent"
android:layout_height="30dp"
android:layout_weight="1"
android:layout_marginLeft="10dp"
android:layout_marginRight="6dp"
android:background="@drawable/mask_round_rim_circle_gray">

<ImageView
android:id="@+id/iv_tag"
android:layout_width="20dp"
android:layout_height="20dp"
android:layout_alignParentLeft="true"
android:layout_centerVertical="true"
android:layout_marginLeft="8dp"
android:scaleType="centerCrop"
android:src="@drawable/ic_content_search"/>

<AutoCompleteTextView
android:id="@+id/et_content_search"
android:layout_width="match_parent"
android:layout_height="match_parent"
android:layout_centerHorizontal="true"
android:layout_centerVertical="true"
android:layout_marginLeft="5dp"
android:layout_toRightOf="@+id/iv_tag"
android:background="@null"
android:ems="10"
android:hint="@string/hint_input_search"
android:imeOptions="actionSearch"
android:textCursorDrawable="@drawable/cursor_blue"
android:inputType="text"
android:maxLines="1"
android:textColor="@color/default_blue"
android:textColorHint="@color/default_et_hint"
android:textSize="13sp">

<requestFocus/>
</AutoCompleteTextView>

<ImageView
android:id="@+id/iv_del_content"
android:layout_width="30dp"
android:layout_height="match_parent"
android:layout_alignParentRight="true"
android:layout_centerVertical="true"
android:scaleType="centerCrop"
android:src="@drawable/sl_del_content"
android:visibility="gone"
/>

</RelativeLayout>

<Button
android:id="@+id/btn_content_search"
android:layout_width="60dp"
android:layout_height="wrap_content"
android:background="@null"
android:text="@string/text_search"
android:textSize="14sp"
android:textColor="@color/white"
/>

</LinearLayout>

效果如图:
布局效果图
这里的输入框用的是AutoCompleteTextView,它是继承EditTextView的,可以实现搜索文字补全的功能, android:imeOptions=”actionSearch”这句是把软键盘上的回车键改为搜索。
接着我们可以通过一些方法对ui和搜索间隔时长进行自定义:

1
2
3
4
5
6
7
8
9
10
11
12
13
14
15
16
17
18
19
20
21
22
23
24
25
26
27
28
29
30
31
32
33
34
35
36
37
38
39
40
41
42
43
44
45
46
47
48
49
50
51
52
53
54
55
56
57
58
59
60
61
62
63
64
65
//设置间隔时间
public SearchView setIntervalTime(int intervalTime){
this.intervalTime=intervalTime;
return this;
}

//设置背景颜色
public SearchView setBackGroundColor(int color){
layContentSearch.setBackgroundColor(color);
return this;
}

//设置返回按钮
public SearchView setBackIcon(int resId){
iback.setImageResource(resId);
return this;
}

//设置搜索图标
public SearchView setTagIcon(int resId){
ivTag.setImageResource(resId);
return this;
}

//设置删除图标
public SearchView setDelIcon(int resId){
ib.setImageResource(resId);
return this;
}

//设置搜索文本
public SearchView setSearchText(String text){
search.setText(text);
return this;
}

//设置搜索文本颜色
public SearchView setSearchTextColor(int color){
search.setTextColor(color);
return this;
}

//设置搜索文本背景图片
public SearchView setSearchBackground(int resId){
search.setBackgroundResource(resId);
return this;
}

//设置搜索文本背景颜色
public SearchView setSearchBackgroundColor(int color){
search.setBackgroundColor(color);
return this;
}

//设置搜索框提示文本
public SearchView setSearchHintText(String hintText){
search.setHint(hintText);
return this;
}

//设置搜索框提示文本颜色
public SearchView setSearchHintTextColor(int color){
search.setHintTextColor(color);
return this;
}

为了方便我们在xml中直接进行自定义,可以新建一些自定义的属性:

1
2
3
4
5
6
7
8
9
10
11
12
13
14
15
16
17
18
19
<?xml version="1.0" encoding="utf-8"?>
<resources>

<!--searchview属性自定义-->
<declare-styleable name="SearchView">
<attr name="intervalTime" format="integer"/>
<attr name="backgroundColor" format="color"/>
<attr name="backIcon" format="reference"/>
<attr name="tagIcon" format="reference"/>
<attr name="delIcon" format="reference"/>
<attr name="searchText" format="string"/>
<attr name="searchTextColor" format="color"/>
<attr name="searchBackground" format="reference"/>
<attr name="searchBackgroundColor" format="color"/>
<attr name="searchHintText" format="string"/>
<attr name="searchHintTextColor" format="color"/>

</declare-styleable>
</resources>

在searchview初始化时,载入布局,初始化子view,读取自定义属性:

1
2
3
4
5
6
7
8
9
10
11
12
13
14
15
16
17
18
19
public SearchView(Context context, AttributeSet attrs) {
super(context, attrs);
handler=new Handler();
LayoutInflater.from(context).inflate(R.layout.widget_search_et_btn, this, true);
TypedArray a = context.obtainStyledAttributes(attrs,
R.styleable.SearchView);
initView();
intervalTime=a.getInt(R.styleable.SearchView_intervalTime,1000);
setBackGroundColor(a.getColor(R.styleable.SearchView_backgroundColor,getResources().getColor(R.color.default_blue)));
setBackIcon(a.getResourceId(R.styleable.SearchView_backIcon,R.drawable.ic_title_back_white));
setTagIcon(a.getResourceId(R.styleable.SearchView_tagIcon,R.drawable.ic_content_search));
setDelIcon(a.getResourceId(R.styleable.SearchView_delIcon,R.drawable.sl_del_content));
setSearchText(a.getString(R.styleable.SearchView_searchText));
setSearchTextColor(a.getColor(R.styleable.SearchView_searchTextColor,getResources().getColor(R.color.white)));
setSearchBackground(a.getResourceId(R.styleable.SearchView_searchBackground,android.R.color.transparent));
setSearchBackgroundColor(a.getColor(R.styleable.SearchView_searchBackgroundColor,getResources().getColor(android.R.color.transparent)));
setSearchHintText(a.getString(R.styleable.SearchView_searchHintText));
setSearchHintTextColor(a.getColor(R.styleable.SearchView_searchHintTextColor,getResources().getColor(R.color.default_line)));
}

删除按钮效果
关于删除按钮,我们需要监听文本框的文字变化和点击事件,而且当输入的搜索文字变化时,希望像大多数app一样,有个实时显示搜索结果的效果,但是当输入变化很快时,搜索次数太多可能造成一定的性能下降,我们可以设定一个间隔时间,间隔时间内,不用进行再次搜索:

1
2
3
4
5
6
7
8
9
10
11
12
13
14
15
16
17
18
19
20
21
22
23
24
25
26
27
28
29
30
31
32
33
34
35
36
37
38
39
40
41
42
43
44
45
46
47
48
49
50
51
52
53
54
55
56
57
// 当输入框状态改变时,会调用相应的方法
TextWatcher tw = new TextWatcher() {

@Override
public void onTextChanged(CharSequence s, int start, int before, int count) {
}

@Override
public void beforeTextChanged(CharSequence s, int start, int count, int after) {
}

// 在文字改变后调用
@Override
public void afterTextChanged(Editable s) {
if (s.length() == 0) {
hideBtn();// 隐藏按钮
} else {
showBtn();// 显示按钮
}


//如果搜索间隔时间大于1秒的延迟再搜索
if (System.currentTimeMillis() - lastTime > intervalTime) {
//1秒延迟后搜索
handler.postDelayed(new Runnable() {
@Override
public void run() {
searchEvent.onSearch();
}
}, intervalTime);

lastTime=System.currentTimeMillis();
}
}
};

// 设置按钮不可见
private void hideBtn() {

if (ib.isShown())
ib.setVisibility(View.GONE);
}

// 设置按钮可见
private void showBtn() {
if (!ib.isShown())
ib.setVisibility(View.VISIBLE);
}

// 添加按钮点击事件
ib.setOnClickListener(new OnClickListener() {
@Override
public void onClick(View v) {
hideBtn();// 隐藏按钮
et.setText("");// 设置输入框内容为空
}
});

关于搜索文字补全,这里是给AutoCompleteTextView添加了一个适配器,需要继承BaseAdapter,并实现Filterable接口,具体实现如下:

1
2
3
4
5
6
7
8
9
10
11
12
13
14
15
16
17
18
19
20
21
22
23
24
25
26
27
28
29
30
31
32
33
34
35
36
37
38
39
40
41
42
43
44
45
46
47
48
49
50
51
52
53
54
55
56
57
58
59
60
61
62
63
64
65
66
67
68
69
70
71
72
73
74
75
76
77
78
79
80
81
82
83
84
85
86
87
88
89
90
91
92
93
94
95
96
97
98
99
100
101
102
103
104
105
106
107
public class AutoComplateSearchAdapter extends BaseAdapter implements Filterable {
private ArrayFilter mFilter;
private ArrayList<String> keyList;//数据源列表
private Context context;
private ArrayList<String> mUnfilteredData;//待过滤数据集合

public AutoComplateSearchAdapter(Context context,ArrayList<String> keyList) {
this.context = context;
this.keyList = keyList;
}

@Override
public int getCount() {
return keyList.size();
}

@Override
public Object getItem(int position) {
return keyList.get(position);
}

@Override
public long getItemId(int position) {
return position;
}

@Override
public View getView(int position, View convertView, ViewGroup parent) {
View view;
ViewHolder holder;
if (convertView == null) {
view = View.inflate(context, R.layout.adapter_auto, null);

holder = new ViewHolder();
holder.tv_name = (TextView) view.findViewById(R.id.item_auto_txt);
holder.lineTop = (ImageView) view.findViewById(R.id.item_auto_line_top);
holder.lineBottom = (ImageView) view.findViewById(R.id.item_auto_line_bottom);
view.setTag(holder);
} else {
view = convertView;
holder = (ViewHolder) view.getTag();
}

String key = keyList.get(position);
holder.tv_name.setText(key);
return view;
}

static class ViewHolder {
public TextView tv_name;
public ImageView lineTop;
public ImageView lineBottom;
}

@Override
public Filter getFilter() {
if (mFilter == null) {
mFilter = new ArrayFilter();
}
return mFilter;
}

private final Object mLock = new Object();

private class ArrayFilter extends Filter {

@Override
protected FilterResults performFiltering(CharSequence prefix) {
FilterResults results = new FilterResults();

if (mUnfilteredData == null) {
synchronized (mLock) {
mUnfilteredData = new ArrayList<String>(keyList);
}
}
if (prefix == null || prefix.length() == 0) {
results.values = mUnfilteredData;
results.count = mUnfilteredData.size();
} else {
String prefixString = prefix.toString().toLowerCase();
ArrayList<String> newValues = new ArrayList<String>(mUnfilteredData.size());
for (int i = 0; i < mUnfilteredData.size(); i++) {
String str = mUnfilteredData.get(i);
if (!TextUtils.isEmpty(str) && !TextUtils.isEmpty(prefixString) && str.contains(prefixString)) {
newValues.add(str);
}
}
results.values = newValues;
results.count = newValues.size();
}

return results;
}

@Override
protected void publishResults(CharSequence constraint,
FilterResults results) {
//noinspection unchecked
keyList = (ArrayList<String>) results.values;
if (results.count > 0) {
notifyDataSetChanged();
} else {
notifyDataSetInvalidated();
}
}
}
}

自动补全列表的布局也很简单,相当于list的item:

1
2
3
4
5
6
7
8
9
10
11
12
13
14
15
16
17
18
19
20
21
22
23
24
25
26
27
28
29
30
31
32
<?xml version="1.0" encoding="utf-8"?>
<RelativeLayout xmlns:android="http://schemas.android.com/apk/res/android"
android:layout_width="match_parent"
android:layout_height="35dp"
android:background="@color/white"
>

<ImageView
android:id="@+id/item_auto_line_top"
android:layout_width="match_parent"
android:layout_height="2px"
android:layout_alignParentTop="true"
android:background="#6c01b5c6"/>

<TextView
android:id="@+id/item_auto_txt"
android:layout_width="wrap_content"
android:layout_height="wrap_content"
android:layout_marginLeft="15dp"
android:layout_centerVertical="true"
android:text="cnsio"
android:textColor="@color/default_blue"
android:textSize="14sp"
/>

<ImageView
android:id="@+id/item_auto_line_bottom"
android:layout_width="match_parent"
android:layout_height="2px"
android:layout_alignParentBottom="true"
android:background="#6c01b5c6"/>
</RelativeLayout>

搜索文字自动补全效果图
接下来是数据展示,用的是RecyclerView,这里也做了封装:
新建了一个抽象类SearchActivity继承AppCompatActivity,将RecyclerView封装到fragment并暴露一些数据源,RecyclerView,SearchView的设置方法。

1
2
3
4
5
6
7
8
9
10
11
12
13
14
15
16
17
18
19
20
21
22
23
24
25
26
27
28
29
30
31
32
33
34
35
36
37
38
39
40
41
42
43
44
45
46
47
48
49
50
51
52
53
54
55
56
protected SearchView searchView;
protected ResultFragment resultFragment;

//search to do 搜索逻辑
protected abstract void doSearch();
//set result list adapter 设置结果列表适配器
protected abstract RecyclerView.Adapter setResultListAdapter();

//return search content input
protected String getSearchContent(){
return searchView.getText().toString().trim();
}

//bind searchview 绑定searchview
protected void findSearchView(int searchViewId) {
searchView = (SearchView) this.findViewById(searchViewId);
searchView.setSearchEvent(new SearchView.searchEvent() {
@Override
public void onSearch() {
doSearch();
}

@Override
public void back() {
finish();
}

});
}

//set search keylist Completion adapter 设置自动补全搜索关键字适配器
protected void setKeyListAdapter (ArrayList<String> keyList){
searchView.setKeyListAdapter(keyList);
}

//set result list divider 设置结果列表分割线,可重写
protected RecyclerView.ItemDecoration setResultListDivider(){
return new RecycleViewDivider(this, LinearLayoutManager.HORIZONTAL, 10, getResources().getColor(R.color.bg));
}

//set result list LayoutManager 设置RecyclerView的布局管理器
protected RecyclerView.LayoutManager setLayoutManager(){
return new LinearLayoutManager(this);
}

//init result fragment 初始化结果分页
protected void initResultFragment(int SearchFragmentId) {
resultFragment = new ResultFragment();
FragmentTransaction transaction = getSupportFragmentManager().beginTransaction();

// Bundle bundle = new Bundle();
// fragment.setArguments(bundle);

transaction.replace(SearchFragmentId, resultFragment);
transaction.commit();
}

隐藏软键盘
接下来是实现点击其它区域,隐藏软键盘并清除输入框焦点:

1
2
3
4
5
6
7
8
9
10
11
12
13
14
15
16
17
18
19
20
21
22
23
24
25
26
27
28
29
30
31
32
33
34
35
36
37
38
39
40
41
42
43
44
45
46
47
48
49
50
51
52
53
54
55
56
57
58
59
60
61
62
63
64
65
66
67
68
69
70
71
72
73
74
75
76
77
78
79
80
81
82
83
84
85
86
87
88
89
90
91
92
    //清除焦点
private void clearViewFocus(View v, View... views) {
if (null != v && null != views && views.length > 0) {
for (View view : views) {
if (v.getId() == view.getId()) {
v.setEnabled(false);
break;
}
}
}
}

//得到焦点
private void getViewFocus(View v, View... views) {
if (null != v && null != views && views.length > 0) {
for (View view : views) {
if (v.getId() == view.getId()) {
v.setEnabled(true);
break;
}
}
}
}


//view是否得到焦点
private boolean isFocusEditText(View v, View... views) {
if (v instanceof EditText) {
EditText tmp_et = (EditText) v;
for (View view : views) {
if (tmp_et.getId() == view.getId()) {
return true;
}
}
}
return false;
}


//是否触摸在指定view上面
private boolean isTouchView(View[] views, MotionEvent ev) {
if (views == null || views.length == 0) return false;
int[] location = new int[2];
for (View view : views) {
view.getLocationOnScreen(location);
int x = location[0];
int y = location[1];
if (ev.getX() > x && ev.getX() < (x + view.getWidth())
&& ev.getY() > y && ev.getY() < (y + view.getHeight())) {
return true;
}
}
return false;
}

//隐藏键盘逻辑
@Override
public boolean dispatchTouchEvent(MotionEvent ev) {
if (ev.getAction() == MotionEvent.ACTION_DOWN) {
View v = getCurrentFocus(); //得到当前activity的焦点view
if (isTouchView(filterViewByIds(), ev)) //触摸到不隐藏键盘的view不做处理
return super.dispatchTouchEvent(ev);
if(isTouchView(hideSoftByEditViewIds(), ev)){//触摸到隐藏键盘的view不做处理
getViewFocus(v,hideSoftByEditViewIds());
return super.dispatchTouchEvent(ev);
}
//触摸到其它view
if (hideSoftByEditViewIds() == null || hideSoftByEditViewIds().length == 0)
return super.dispatchTouchEvent(ev);
// view得到了焦点
if (isFocusEditText(v, hideSoftByEditViewIds())) {
//清除隐藏键盘的view焦点
clearViewFocus(v, hideSoftByEditViewIds());
//隐藏键盘
InputMethodUtils.hideKeyBoard(this);
}
}
return super.dispatchTouchEvent(ev);

}

//传入Id,触摸到其它view时,隐藏此view对应的软键盘
protected View[] hideSoftByEditViewIds() {
View[] views = {searchView.getEditView()};
return views;
}


//传入要过滤的View,过滤之后将不会隐藏软键盘
protected View[] filterViewByIds() {
return null;
}

lib库的使用

最后说明一下使用方法,在使用lib库时,需要让搜索界面的activity继承SearchActivity,实现其中的抽象方法:

1
2
3
4
5
6
7
8
9
10
11
12
//搜索逻辑
protected void doSearch() {
resultListAdapter.setData(search(getSearchContent()));
}

@Override
protected RecyclerView.Adapter setResultListAdapter() {
//bind data 绑定数据和适配器
resultListAdapter=new ResultListAdapter();
resultListAdapter.setData(newsDTOs);
return resultListAdapter;
}

结果列表RecyclerView的Adapter的实现就不赘述了,根据展示的需求自定义,RecyclerView的布局管理器,分割线,隐藏软件盘的view过滤,需要隐藏软键盘的view设置都是可以重写SearchActivity中对应的方法进行自定义。

搜索界面的activity,初始化时需要绑定searchview的id和fragment的容器id

1
2
3
4
//初始化结果分页
initResultFragment(R.id.ll_content);
//绑定searchview
findSearchView(R.id.sc_content);

可以设置searchview自动补全的数据源,自定义ui

1
2
3
4
5
6
7
8
9
10
11
12
13
14
15
16
17
18
//设置搜索关键字自动补全
setKeyListAdapter(setKeyList());
setSearchView();

//custom searchview ui 自定义searchview的外观
public void setSearchView(){
searchView.setIntervalTime(1000)
.setBackGroundColor(getResources().getColor(R.color.default_blue))
.setBackIcon(R.drawable.ic_title_back_white)
.setTagIcon(R.drawable.ic_content_search)
.setDelIcon(R.drawable.sl_del_content)
.setSearchText(getString(R.string.text_search))
.setSearchTextColor(getResources().getColor(R.color.white))
.setSearchBackground(getResources().getColor(android.R.color.transparent))
.setSearchBackgroundColor(getResources().getColor(android.R.color.transparent))
.setSearchHintText(getString(R.string.hint_input_search))
.setSearchHintTextColor(getResources().getColor(R.color.default_line));
}

在xml中直接自定义ui

1
2
3
4
5
6
7
8
9
10
11
12
<searchview.jessie.com.searchviewlib.SearchView
android:id="@+id/sc_content"
android:layout_width="match_parent"
android:layout_height="wrap_content"
jessie:intervalTime="2000"
jessie:backIcon="@drawable/ic_title_back_white"
jessie:backgroundColor="@color/default_blue"
jessie:tagIcon="@drawable/ic_content_search"
jessie:delIcon="@drawable/sl_del_content"
jessie:searchText="@string/text_search"
jessie:searchTextColor="@color/white"
jessie:searchHintText="@string/hint_input_search"/>

到此,封装自己的searchview就完成了,需要查看完整代码,这里是传送门


简介

我是JessieK,从学校起开始自学android,很幸运,毕业后顺利从事android开发,学校里为数不多的女coder之一(相信读计算机的女生会深有感触~( ̄▽ ̄)ブ,在浏览博客的时候发现,不少女coder很牛逼的,相信不久的 将来,越来越多的女生会进入到这个行业,成为行业中的精英)有人可能会疑惑,女生从事这个职业的很少,为什么会选择这条路呢?很简单,因为热爱。俗话说搜索引擎是我们最好的老师,跟很多刚入门的小伙伴一样,从学习编程以来,浏览过无数牛人的博客,十分敬仰,他们对代码的热情和敬业精神让我感到深深佩服,很早就希望拥有自己的技术博客,但苦于公司业务多,经常加班,没时间搁置了,现在总算闲下来了,其实闲下来也挺不安的,有种坐吃等死的感觉,作为一个有信仰的coder,学无止境啊,想结合平时的学习和工作,写点文章,准备折腾下自己的博客了。


博客搭建之路

说来有些惭愧,由于长久以来从事android开发,对前端的东西并不是很了解,随着小程序和react native的火热,我觉得是有必要去学习的,不过现在也不可能花掉巨大的学习成本后再弄博客吧,我也不想花钱去买收费的云空间,立马让我想到了GitHub,我知道现在的博客框架很多,相信能快速搭建出来,准备找个免费的云空间和博客框架,搭一个博客,只是简单纯粹的写作,经过google以后,发现大多数人都推荐GithubPage+Hexo来搭建免费博客,然后就开始了自己的折腾之旅。

Hexo是什么?

Hexo 是一个快速、简洁且高效的博客框架。Hexo使用Markdown(或其他渲染引擎)解析文章,在几秒内,即可利用靓丽的主题生成静态网页。说白了,就是集各种博客管理插件和多款主题于一身的能快速搭出博客的框架。

GitHubPage是什么?

GitHubPage主要的用法有两种。一种是你的 GitHub 用户名建立的 username.github.io,这个是GitHub自动为每一个用户分配的域名,如果仅仅是建立个人博客的话,这种方法就可以了,另一种是依附项目的 Project Pages。具体用法请参考: Github Pages官方文档

搭建环境

1. 必须先安装以下环境

由于工作原因,我经常是mac和windows来回切换,安装方式有很多,可以用控制台安装,这里面花样就很多了,也可以去官网下载安装包,不管是mac还是windows,需要设置全局变量,保证node.js和git的命令行使用,我是直接在官网下载的安装包,安装完后,已经自动配置好了。

  1. 安装Hexo
    通过npm命令即可安装。

    npm install hexo-cli -g
    npm install hexo –save

如果命令无法运行,可以尝试更换taobao的npm源
npm install -g cnpm –registry=https://registry.npm.taobao.org
创建博客的工程目录文件夹,如blog文件夹。进入该文件夹根目录,利用hexo框架进行初始化。

$hexo init

$npm install

hexo目录结构

其中主要使用的文件夹
public是需要上传到github的文件
themes为下载的主题文件
source为页面文件,包括头像文件,关于页面,所有上传的文章
可以先测试一下
hexo g
hexo s
此时控制台打印一个地址http://localhost:4000/
mac下使用iterm就可以直接点击跳转
windows下使用cmder按住ctrl就可以点击跳转
注意,所有hexo命令必须要在初始化后的文件夹根目录下(即执行过 $hexo init的文件夹根目录)
常用的Hexo命令
新建文章

$ hexo new "xxx"  可以简写为 $ hexo n

新建页面

$ hexo new page "xxx" 

生成资源文件

$ hexo g 

本地预览

$ hexo s

部署到github

$ hexo d

还可以使用一些组合命令:
生成资源文件并部署

$ hexo d -g

生成资源文件并预览

$ hexo s -g 
  1. 配置GitHub Page
  • 我们需要新建一个项目来存放GitHub Page,new repository。(在这里踩过坑,由于采用的是username.github.io来建立博客,所以必须保证填写repository name的时候,格式一定要严格按照username.github.io,且这里的用户名username与GitHub完全一致。)

如果本机没有生成过ssh密钥(路径 C:/Users/用户名/.ssh/),我们需要生成一对密钥
控制台输入以下命令,填写你的邮箱

$ssh-keygen -t rsa -C "your_email@example.com"

Generating public/private rsa key pair.
Enter file in which to save the key (/c/Users/you/.ssh/id_rsa): [Press enter]
这个时候直接回车就好,你也可以输入特定的文件名,如/c/Users/you/.ssh/id_rsa来保存

Enter passphrase (empty for no passphrase): [Type a passphrase]
Enter same passphrase again: [Type passphrase again]
这个时候不写密码也可以
密钥创建成功后,输入

clip < ~/.ssh/id_rsa.pub

复制你的公钥到剪切板
接着,需要在github的设置界面添加你的公钥
title:只要自己能区分是哪台电脑的公钥就行
key:刚才复制的公钥
然后保存

到blog文件夹根目录找到_config.yml
配置文件的最后

deploy:
  type:

改为:

deploy:  
  type: git
  repository: http://github.com/yourname/username.github.io.git
  branch: master

这里的repository地址就是github项目页面的https地址
保存后,控制台输入

$ hexo g

$ hexo d

这里才过坑,报一个错误
ERROR Deployer not found: git
找不到hexo的git插件,这时我们需要安装这个插件
控制台输入

$ npm install hexo-deployer-git --save

部署成功后就可以通过username.github.io访问了

Hexo有很多主题可供下载,可以去官网挑选,需要根据该主题的文档进行配置官网主题,同时还有很多博客管理插件,可供下载官网插件
我选择了一个star最多的主题NexT,它内置3种外观,而且配置文档十分详细NexT官网
到此,第一篇文章结束了,我的博客之旅从此开始~

后续

随着开源中国(oschina/码云)的发展,推出了类似githubPage的东西,码云也自动为每一个用户分配 username.gitee.io的域名,适合搭建免费的个人博客,不需要太多的维护成本,大家都懂的github在国内使用的弊端,这个搭建的博客速度明显快很多,算是很良心了(不像Coding Pages还有广告跳转页orz…但愿它能一直良心下去),而且它还有免费的私有仓库。搭建的过程跟githubPag差不多,项目名称和仓库路径都必须和你的用户名一致。

2017-09-07记

mac下,hexo任何命令都报错Error: Cannot find module './build/Release/DTraceProviderBindings'
google了许久,先是

1
2
$ npm uninstall hexo
$ npm install hexo --no-optional

无效

接着

1
2
$ npm uninstall hexo-cli -g
$ npm install hexo-cli -g

依旧无效

最后卸载dtrace-provider这个组件

1
npm uninstall dtrace-provider

终于正常了
据说安装 hexo-cli 的时候依赖了该组件

2018-10-16记

mac下,修改文章的名字大小写无效问题,由于mac和windows下git本身就忽略大小写,所以导致修改了文章的名字大小写本地生成正常,远程仓库死活不更新的问题。
解决方案:

  1. 进入博客目录.deploy_git文件夹下的.git文件夹,修改里面的git配置文件config,把ignorecase = true改为ignorecase = false,让git不要忽略大小写
  2. 如果你仅仅是做了上一步的话,再次上传会生成一个大写的文件夹和一个小写的文件夹,需要先删除git缓存中的博客目录下的 .deploy_git 文件夹下的所有文件,再 push 一次,博客目录下执行
    1
    2
    3
    4
    cd .deploy_git
    git rm -rf *
    git commit -m 'clean all file'
    git push
  3. 此时再重新生成上传就没有问题了,博客目录下执行hexo clean && hexo g && hexo d